Test store
You can allocate a test store yourself, without asking us for anything. You place real orders on it, through the app, and verify that your integration works end to end before the first live store.
| Rule | Value |
|---|---|
| Allocation length | 2 weeks, then it expires automatically |
| Concurrent stores | one per POS |
| Total number | limited — if none is free, you wait for someone to release one |
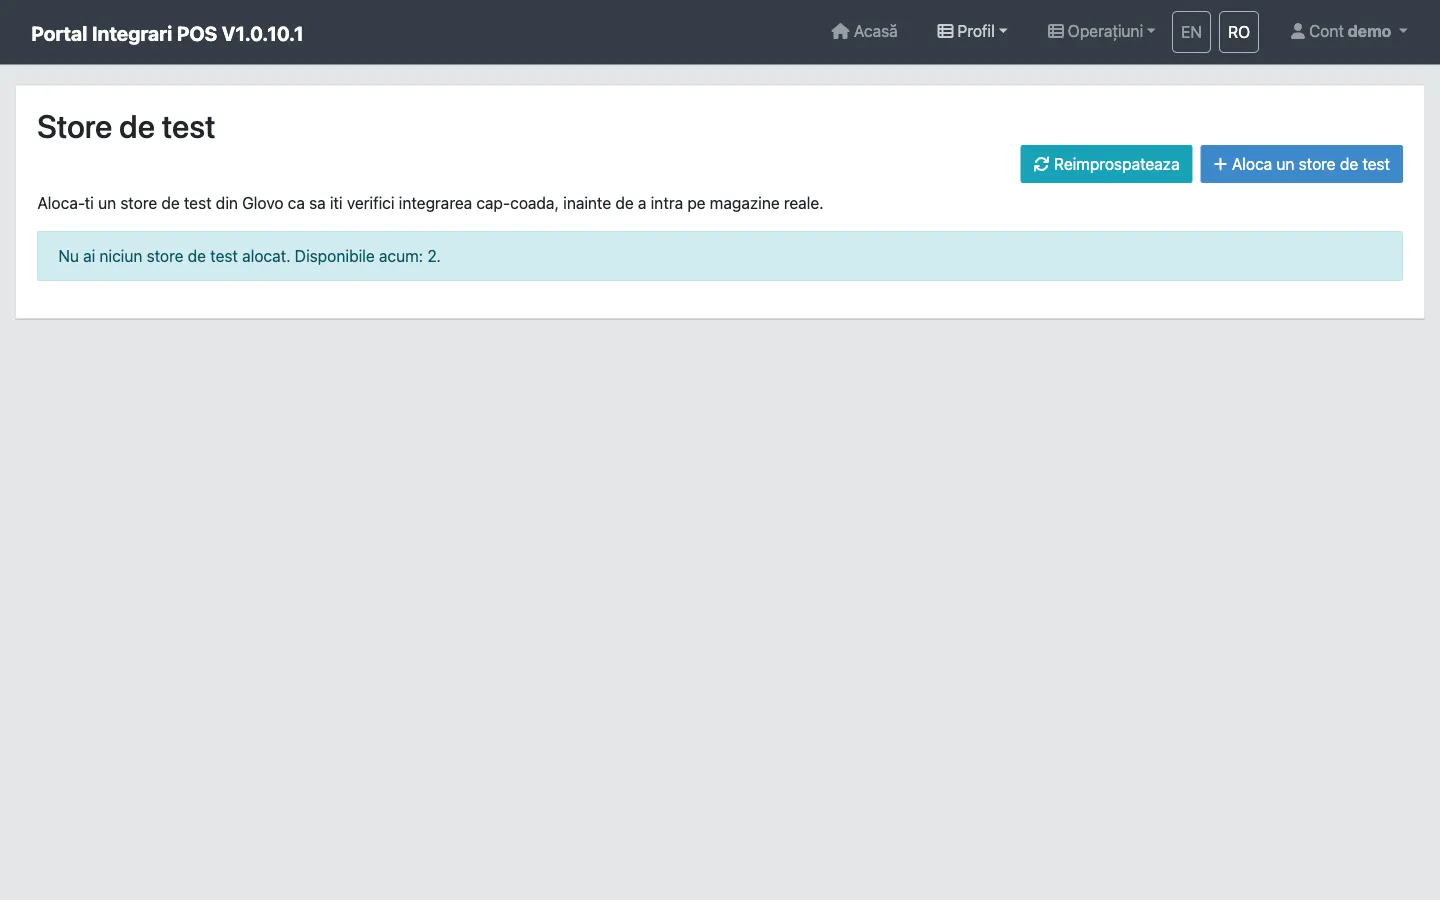
When you hold none, the screen tells you how many are free at that moment.
Step by step
Section titled “Step by step”-
Allocate your store
Section titled “Allocate your store”In the portal, Profil → Aloca store de test, press Aloca un store de test. You immediately see how many are available.
You hold one test store at a time. While it is allocated, the page shows you that one.
-
Configure your webhook
Section titled “Configure your webhook”In the Where we send your test orders section you fill in:
Field What you enter Your URL The address where you want to receive test orders. Token A value of your choosing, which we send back on Authorization.You choose the token precisely so you can verify the source of the request. Treat it as a password.
-
Create a separate customer account
Section titled “Create a separate customer account”The test store is hidden from ordinary users. To order from it you need a new account, with an email address you do not use for your own personal orders.
After the first sign-in, add and verify a phone number — without it you cannot place orders.
-
Place orders
Section titled “Place orders”Open the store using the link in the allocation page and order normally.
The order reaches your URL in the standard format, with your token on
Authorization. -
Check what you received
Section titled “Check what you received”Look the order up by code and compare what we sent with what your system processed.
-
Release the store
Section titled “Release the store”When you are done, press Release. The webhook configuration is cleared and the store returns to the pool for another integrator.
What the allocation page shows
Section titled “What the allocation page shows”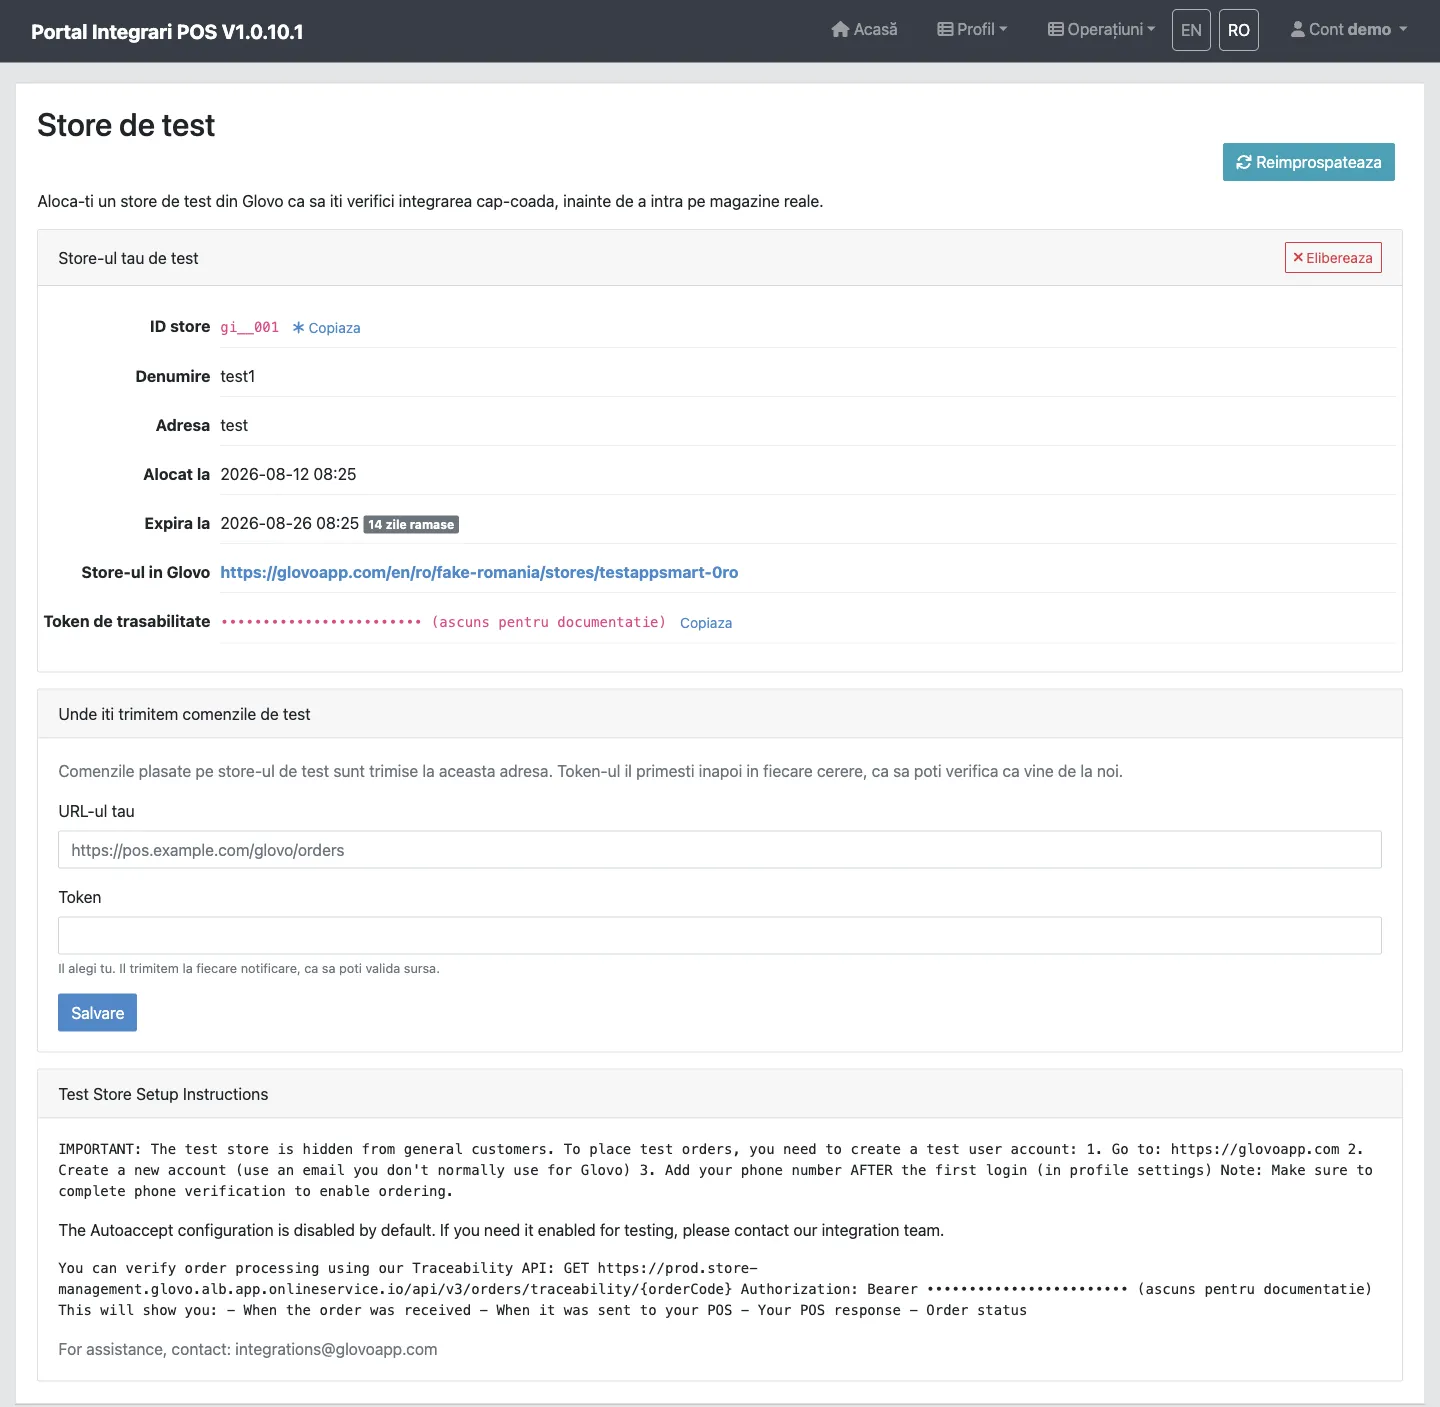
| Field | What it is for |
|---|---|
| Store ID | The store identifier, the one you receive in store_id. |
| Name and Address | So you can find the store in the app. |
| Allocated at / Expires at | With the days left until it expires on its own. |
| The store in the app | A direct link. If it is missing, write to us and we will send it. |
| Traceability token | A key tied to this store. You need it for nothing in the flow above; treat it as a password and do not publish it. |
Below them sit the webhook form and a block of setup instructions.
If you forget to release
Section titled “If you forget to release”The allocation expires on its own after two weeks and the store returns to the pool. You need do nothing — but if you finished testing earlier, release it so you do not block someone else.