Brands and locations
The structure has two levels: a brand groups one or more locations. Orders arrive per location; notification settings can also be switched off at brand level.
Brands
Section titled “Brands”From the Operations → Brand menu, choose Add Brand.
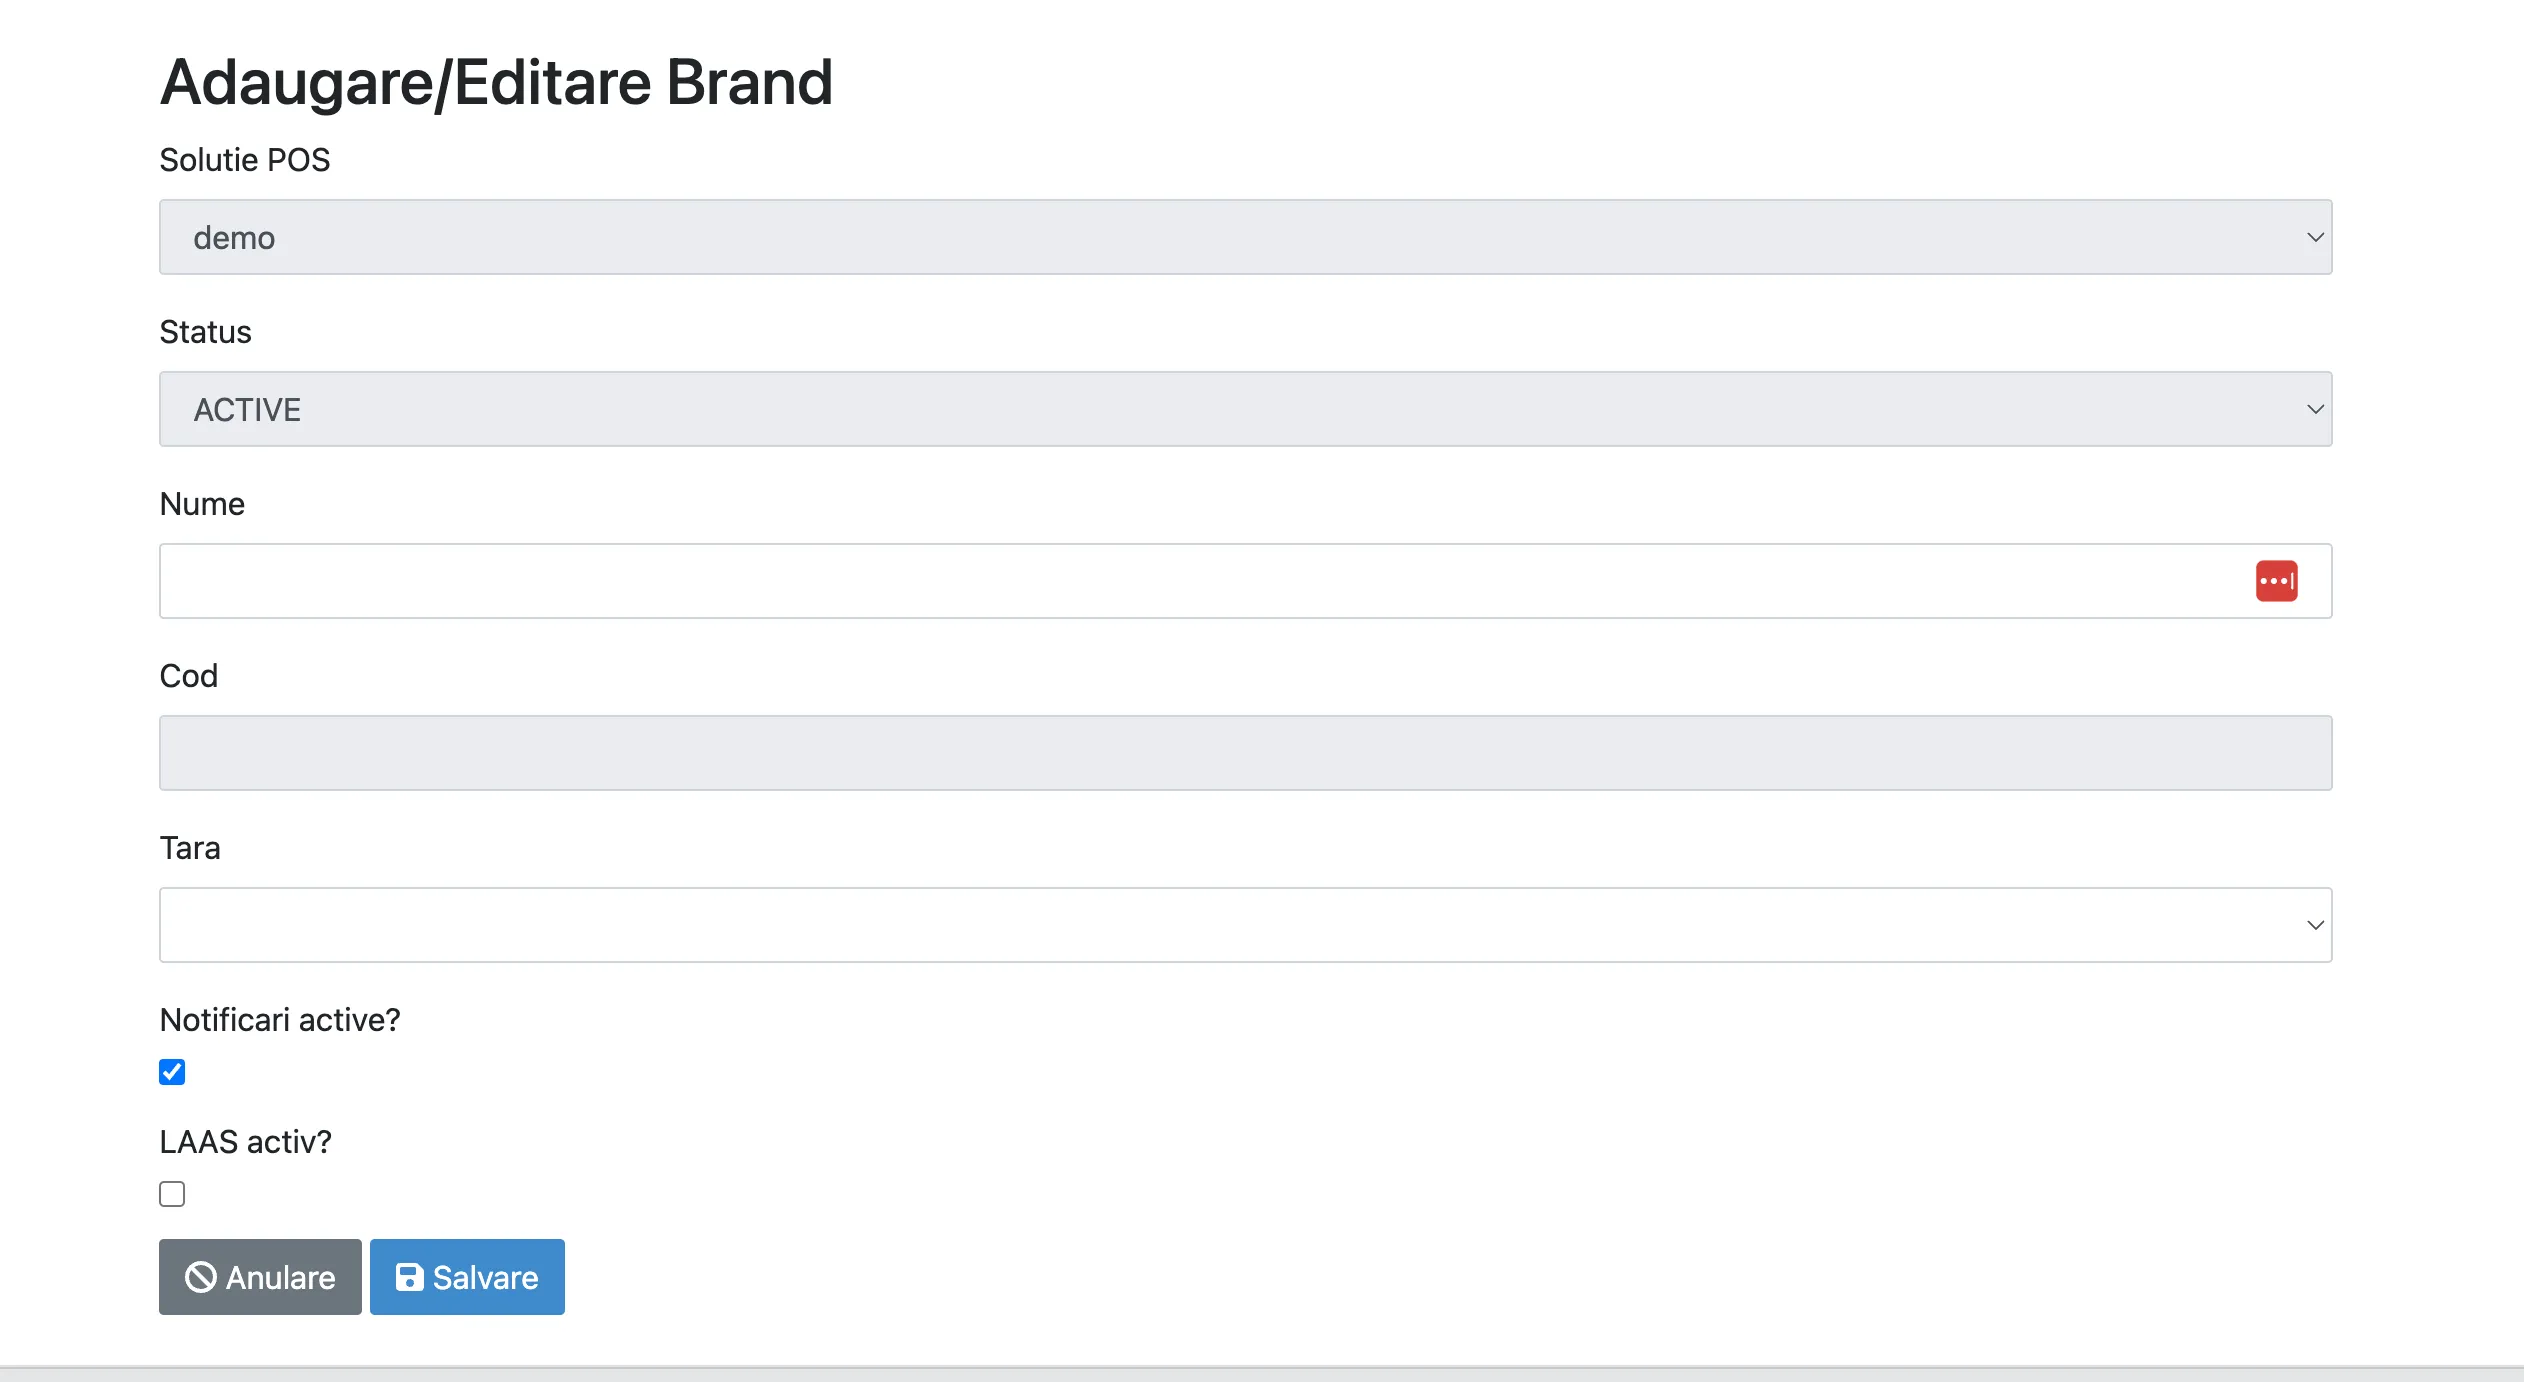
| Option | What it does |
|---|---|
| Notifications active? | When off, it stops notifications for all locations of the brand. |
Locations
Section titled “Locations”From the brand grid, choose View on the brand you want.
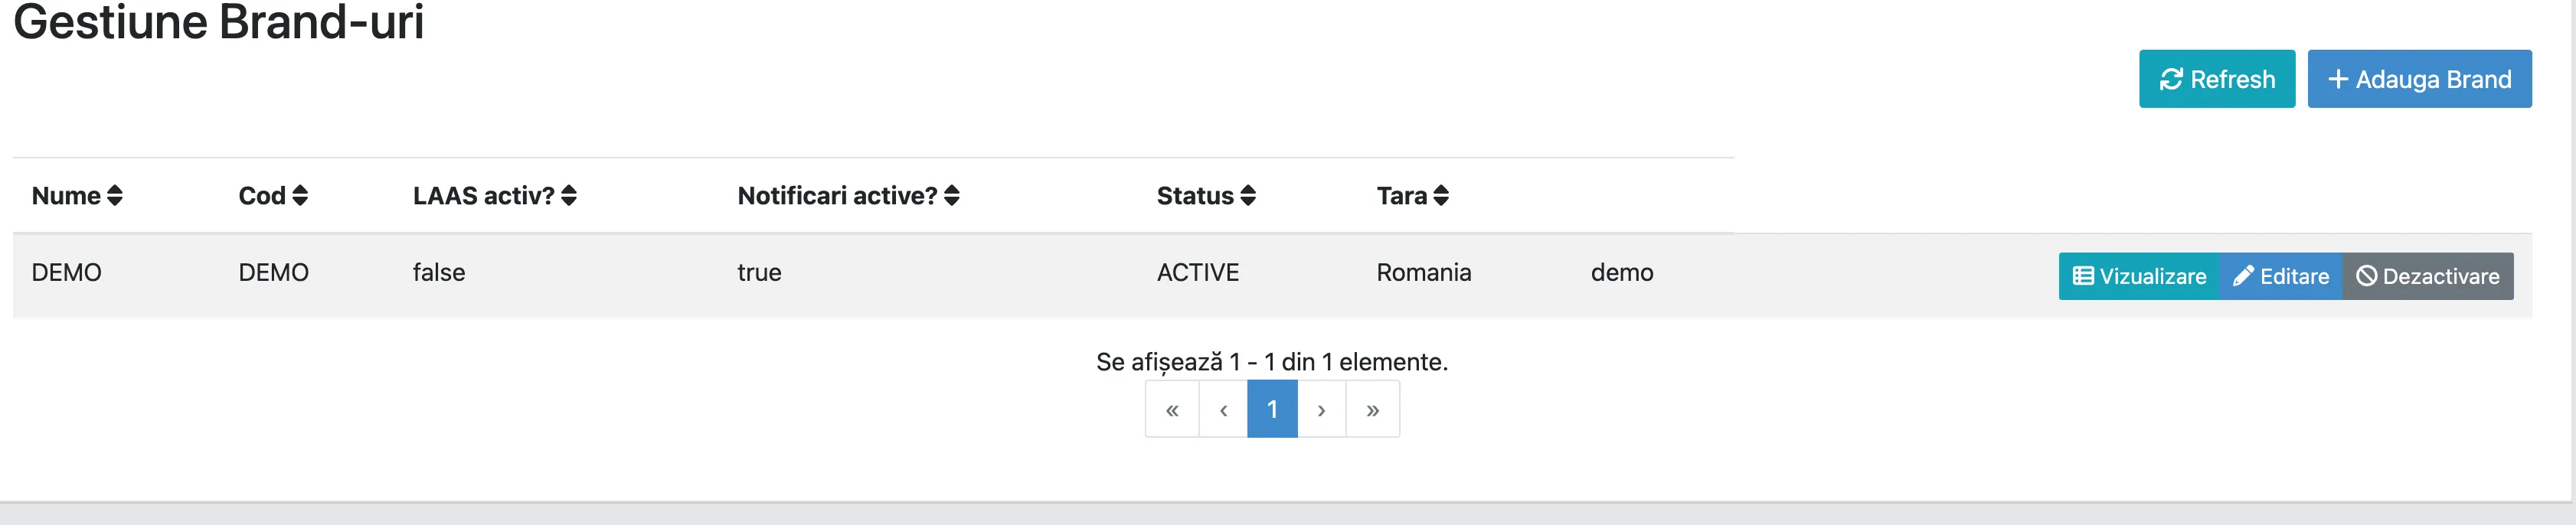
The location management screen opens.
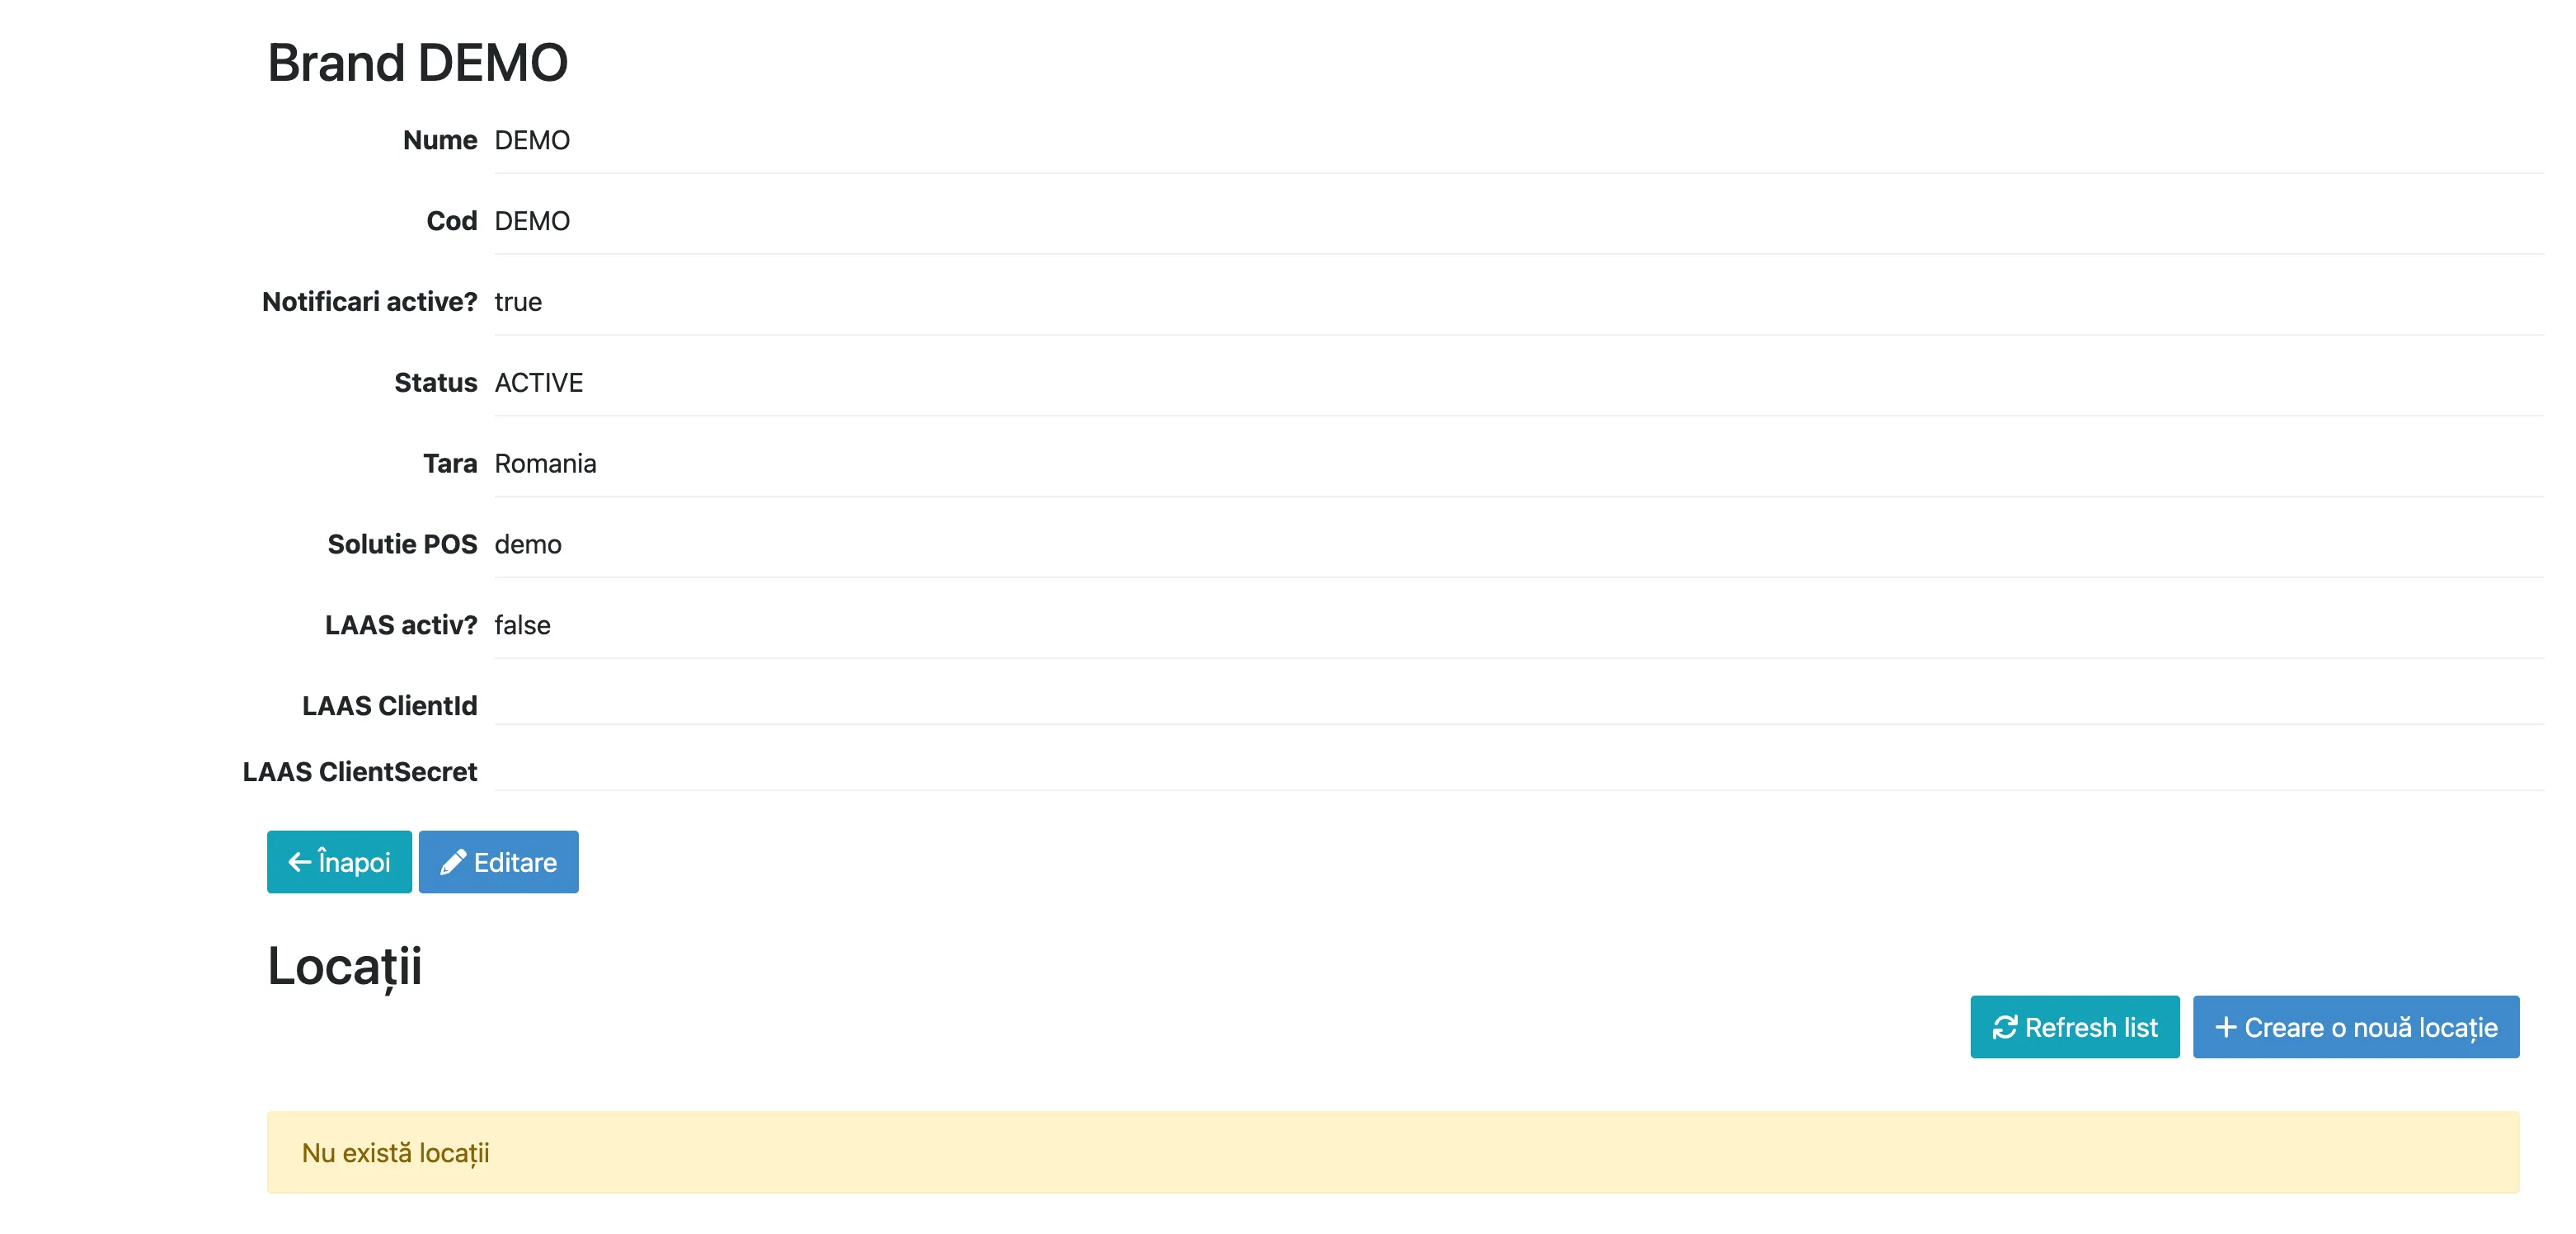
Choose Create a new location.
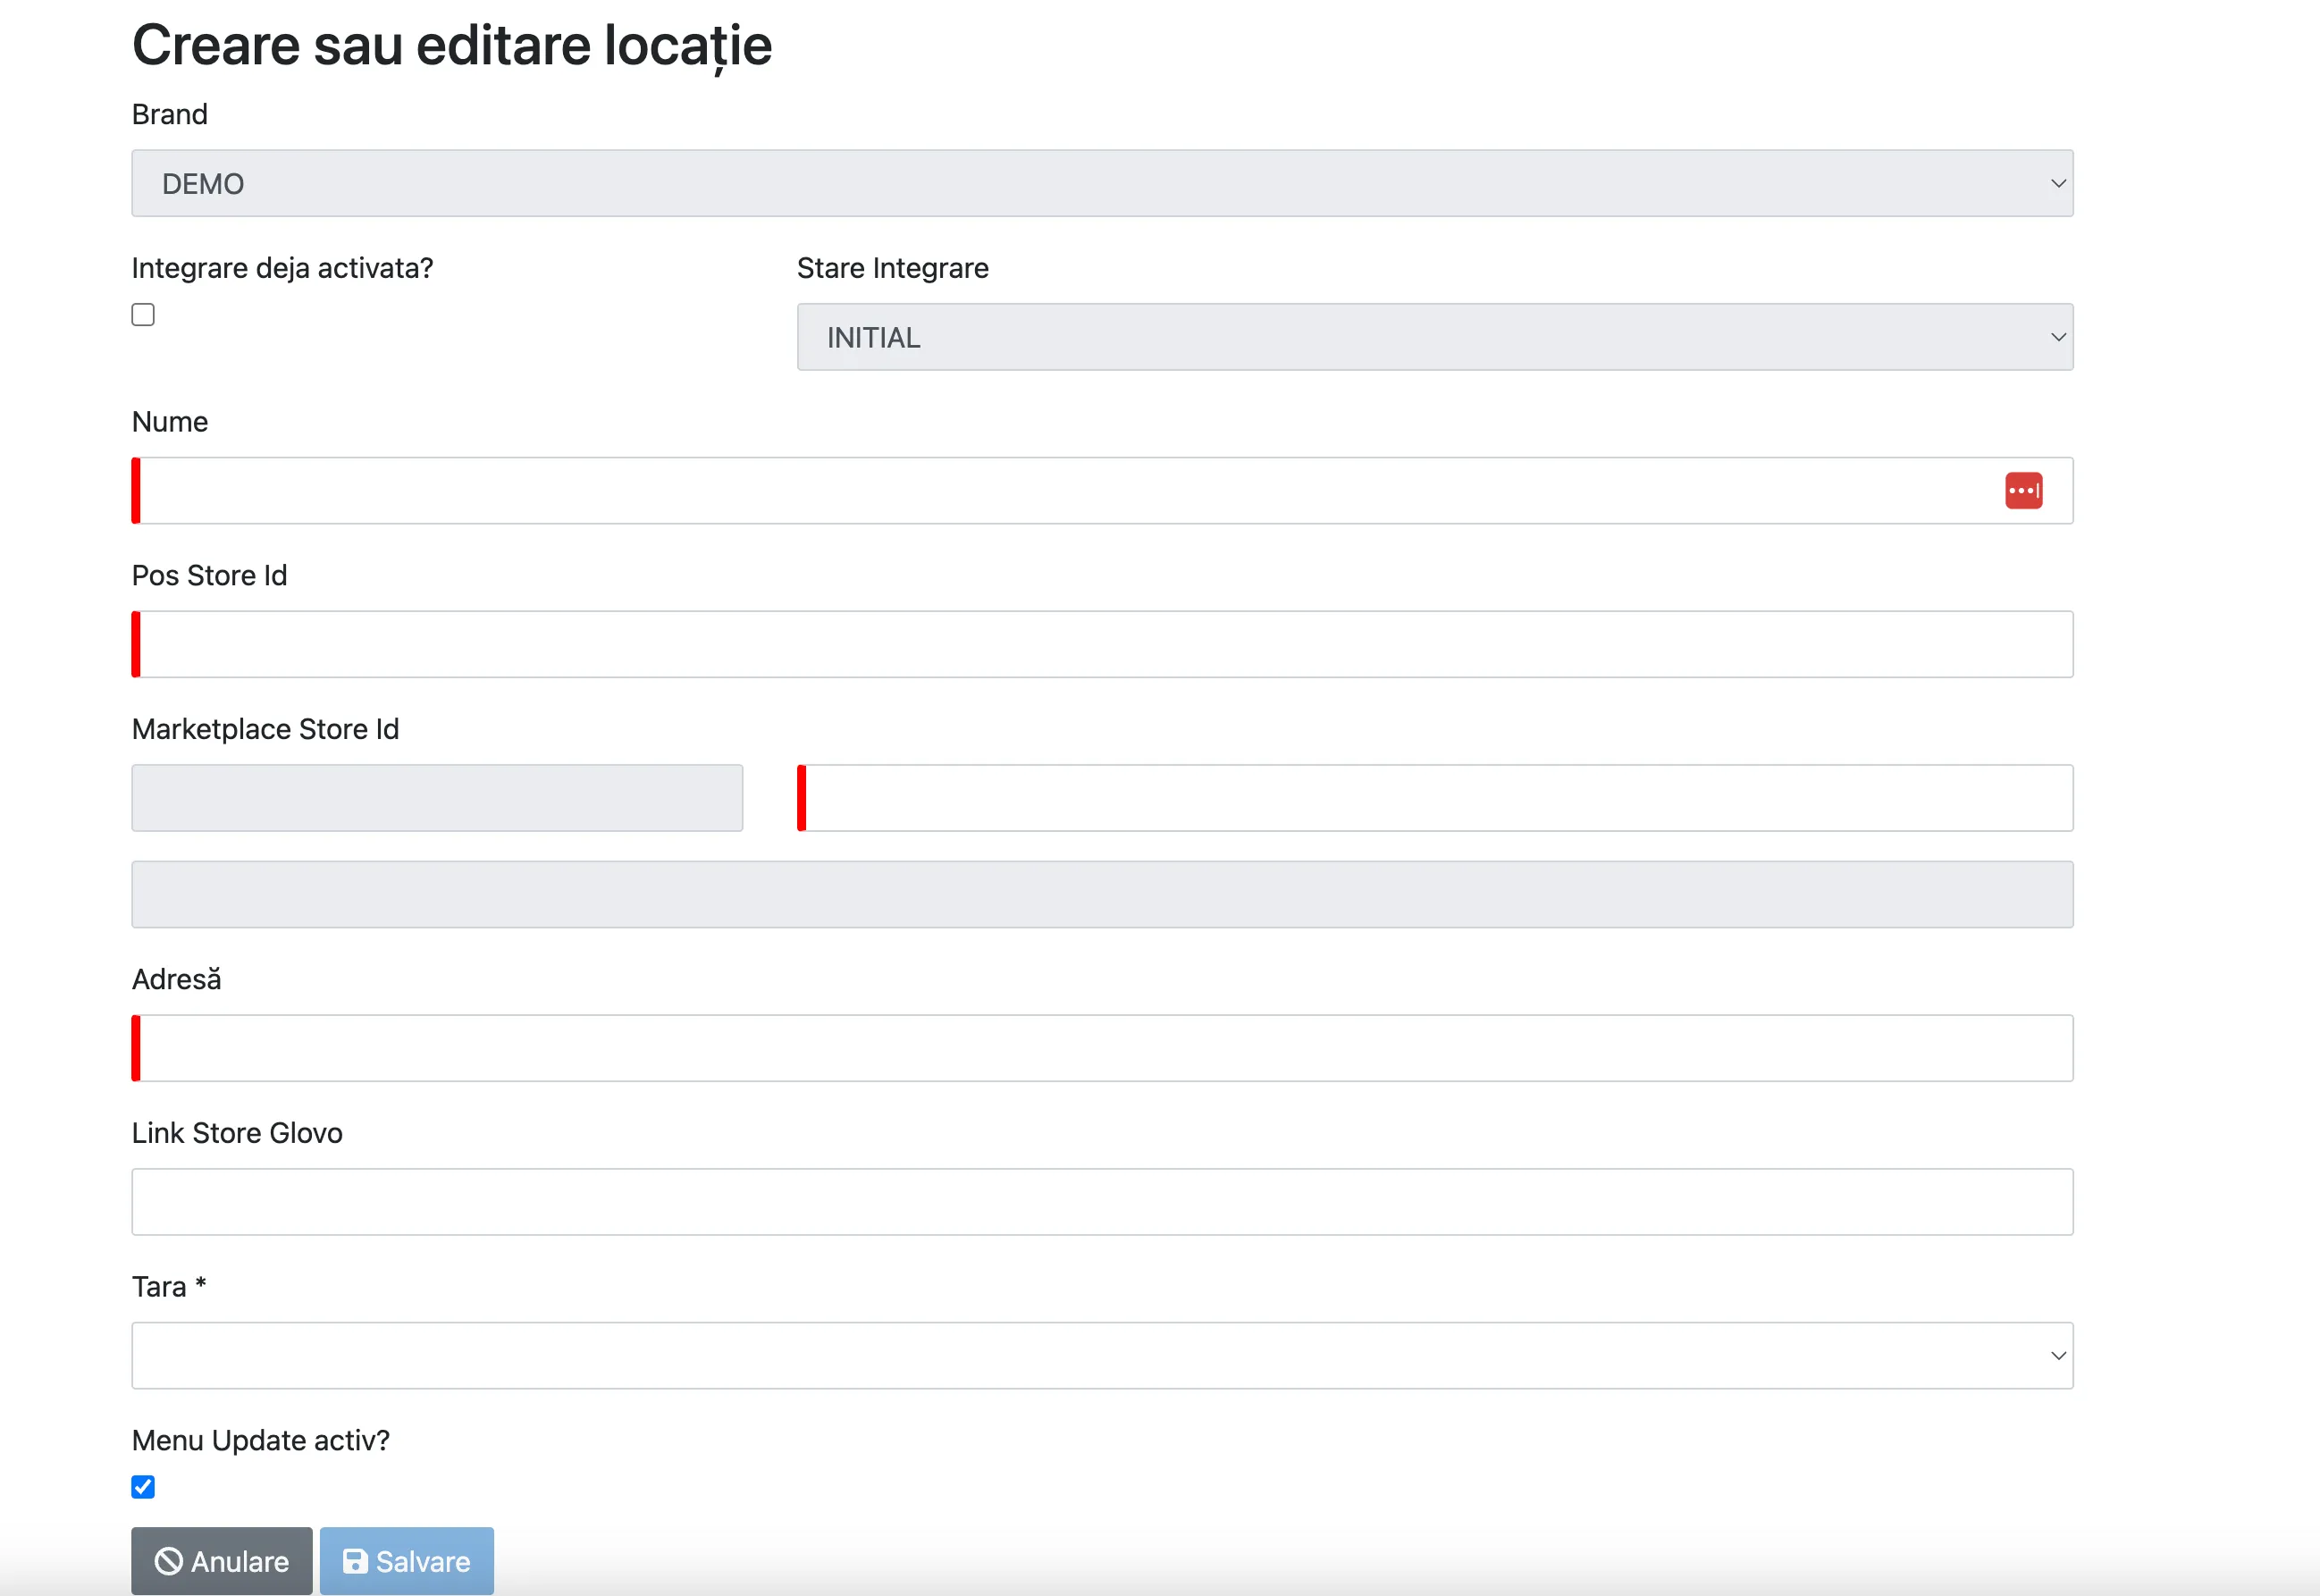
Location fields
Section titled “Location fields”| Field | What you enter |
|---|---|
| Name | The restaurant name as you recognise it. |
| POS Store ID | The location identifier from your own system. The partner_name prefix is added automatically. |
| Address | The restaurant’s physical address. |
| Menu update active? | Turns notifications for this location on or off. |
POS Store ID can be any alphanumeric string as long as it is unique. Together with the prefix it forms the identifier you receive in every order — see terminology.
Activation
Section titled “Activation”After saving, our team is notified to activate the location. From activation onwards, orders placed on it reach your endpoints.
Until then the location exists in the portal but produces no traffic.